Hey there, tech adventurers! 🌟 Ready to dive into the world of network security and make your very own virtual fortress with pfSense? You’re in the right place! We're going to walk you through setting up pfSense as a firewall and router in VMware. So buckle up, grab your favorite snack, and let’s get this party started! 🎉

🛠️ What You’ll Need:
- pfSense (virtual appliance in a VM)
- VMware Workstation/Player
- Host VM (to test your setup)
- A cup of coffee (or tea, or whatever fuels your coding adventures!)
🎯Getting Started with pfSense Installation
Step 1: Downloading pfSense
First things first, let’s grab the pfSense installer. Head over to the pfSense download page and grab the latest version. Make sure you choose the ISO installer for AMD64 architecture, and select a mirror close to your location.

🛠️ Step 2: Creating the pfSense VM in VMware
Now that you’ve got the ISO, it’s time to create the VM.
- Open VMware Workstation/Player and click Create a New Virtual Machine.
- Select Installer disc image file (ISO) and browse to the pfSense ISO you downloaded.
- Choose FreeBSD 64-bit as the guest OS. (Yes, pfSense is based on FreeBSD, cool, right? 😎)
- Name your VM something funky like “pfSense Fortress” and choose a location to save it.
- Assign at least 2 GB of RAM and 2 CPU core.
- Set up the Network Adapters:
- Adapter 1: NAT (for the WAN interface)
- Adapter 2: Host-only (for the LAN interface)
- Finish up and create the VM.

Note: For the host-only adapter use advanced to generate a MAC address.
💾 Step 3: Installing pfSense
Now that your VM is ready, let’s install pfSense.
- Start the VM and you’ll see the pfSense installer boot up. Accept the license.
- Next, select Install and hit Enter.
- Choose Setting up the network and select default as we will change it later.
- Next a prompt will tell to install pfsense if you have a key you can use that one but in this case, we'll use the community edition.
- Next, select continue to choose the defaults as they're enough for this demonstration.
- The installation process will now start—grab that coffee while you wait! ☕


🔌 Step 4: Basic pfSense Configuration
After the reboot, you’ll be greeted with the pfSense console.

Let’s set up the basics:
- Assign Interfaces: You’ll be asked to assign interfaces. Usually,
em0is WAN andem1is LAN. If you’re unsure, you can let pfSense auto-detect them. - Set Interface IPs:
- WAN: Leave it to DHCP or set it manually.

We will be routed to the main screen. Afterwards, we will need to set the interface IP Addresses for em1. My home network already uses the 192.168.0.0/16 RFC1918 range. So I decided to use the 172.16.0.0/16 RFC1918 range instead.
- LAN: Set a static IP (e.g.,
172.16.1.1).
Press 2 to set IP address for the LAN > n > 172.16.1.1 > 24 > press ENTER for none.

Enter N > press ENTER for none > Y > 172.16.1.100 > 172.16.1.200 > N.
3. Access the Web Interface: Open your web browser and go to
https://172.16.1.1 (or the LAN IP you set). Ignore the SSL key error and click on accept the risk and continue.Note: If you cannot open the LAN ip from your host you can open it from a VM guest with the same VMnet adapter you used for LAN in pfsense.

4. Login with the default credentials (Username:
admin, Password: pfsense).
Navigating the pfSense Setup Wizard
- Upon successful login, you'll be automatically redirected to the Setup Wizard.
- Click "Next" to begin the wizard.

On the "General Information" page:
- Set your hostname and domain
- Configure your DNS servers
- Select your time zone
- Click "Next"

On "Time server information" page:
- Choose default or choose what's better suited for you.

On the "LAN Configuration" page:
- Verify or change your LAN IP address
- Adjust the subnet mask if needed (default in this case)
- Click "Next"

On the "Set Admin WebGUI Password" page:
- Enter a new, strong password for the admin account
- Click "Next"

Review the final configuration summary.
Click "Reload" to apply the changes. After that pfsense will be configured.
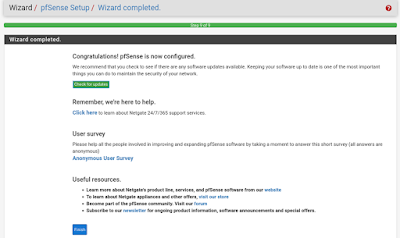
You'll now be at the pfSense dashboard, ready for further configuration.
In this case as we connected to the same LAN network in KALI VM so it will receive DHCP IP from the pfsence machine. To verify this, we can go to "Status/DHCP Leases" from the drop-down menu.

Final Words of Wisdom
Congratulations! You've successfully set up your pfSense system as a fully functional router and DHCP server. By installing pfSense, configuring its core networking features, and verifying your setup, you've established a solid foundation for your network. Your pfSense box is now the heart of your network, efficiently managing traffic and IP assignments. This achievement sets the stage for exploring more advanced features in the future. Well done on creating a smarter, more capable network – you're now ready to tackle whatever networking challenges come your way! Next, we will configure firewall rules in pfsense, until then Happy Hacking!
